If you’re interested in learning how to install fence posts in concrete, we’ll cover everything thing you need to know to complete this project successfully
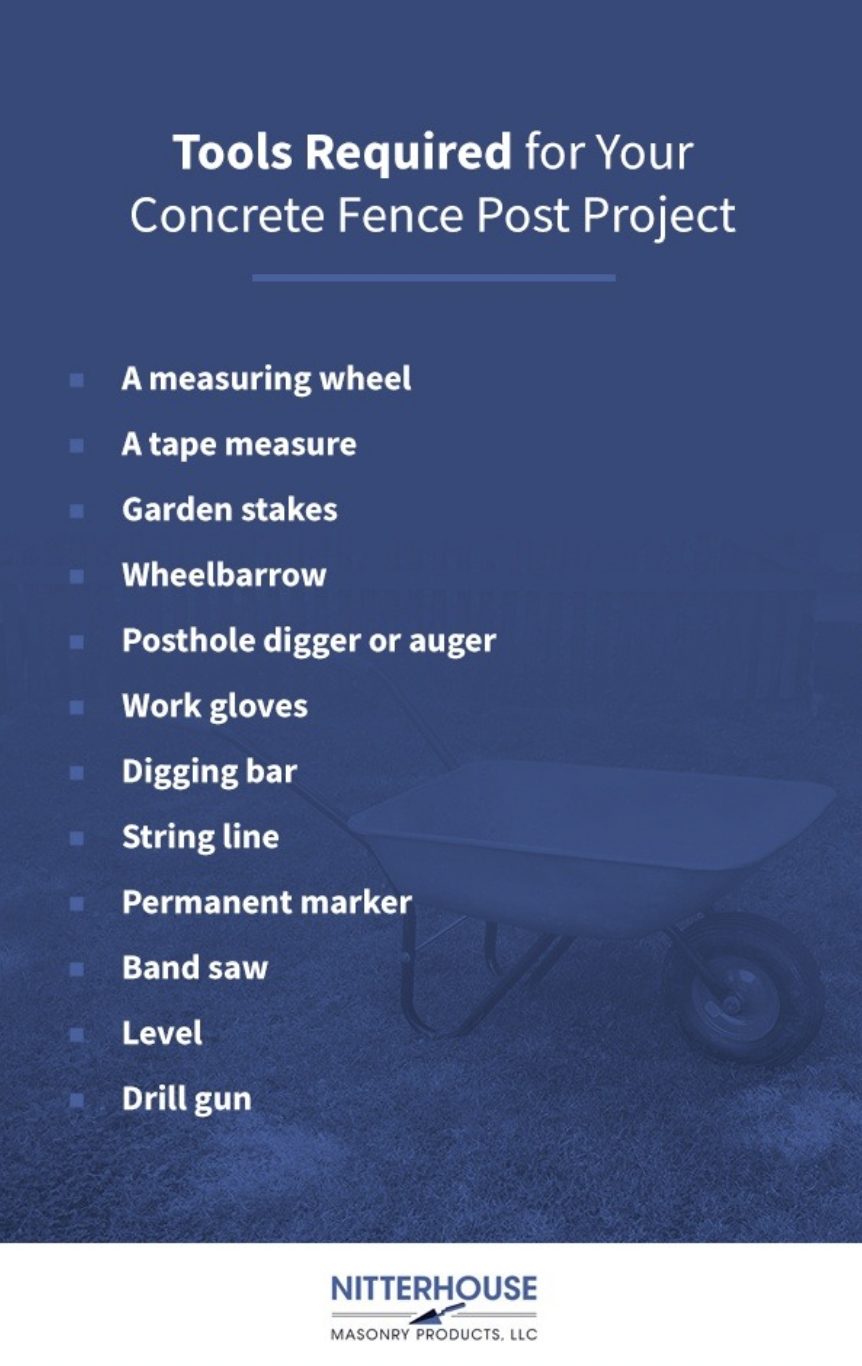
Tools Required for Your Concrete Fence Post Project
Installing fence posts on concrete is a manageable job, but you will need many tools to complete the job.
A measuring wheel: Without a doubt, using a measuring wheel is the best way to measure for a fence. A measuring wheel shows highly accurate measurements on an easy-to-read counter. Most fencing pros use these, and while some models can be quite expensive, the precise measurements they provide make them worth the price.
A tape measure: If your budget is limited, you can use an old-fashioned tape measure instead of a measuring wheel, but if you choose to measure this way, we recommend you do this with one other person so they can keep track of the ground that you have measured. You’ll also need a tape measure for measuring the size of the holes you’ll dig.
Garden stakes: Once you’ve measured your fence area, you will need to mark the locations where your fence posts will be so you’ll know the quantity you need to order. Garden stakes are the best markers, although spray paint is another great option. Fencing professionals traditionally have used orange spray paint, but you are, of course, welcome to use any color of spray paint you like.
Wheelbarrow: When building a fence, you may have to move a significant amount of dirt and shrubs away from the locations of the posts, and a wheelbarrow will come in handy with this task. Wheelbarrows are also useful for mixing the concrete.
Posthole digger or auger: This is a tool designed to dig holes in the ground that you’ll later stick the posts in. Blue Hawk and Kobalt are widely available brands that you should be able to buy at most stores. You can also use an auger, a drill that makes holes in the ground, for digging your postholes.
Work gloves: Work gloves are essential for almost any DIY project — any concrete fence post installation is no exception.
Digging bar: If the ground where you’re installing your fence is rough or rocky, you may need some extra help digging. A digging bar can work in most situations, although if your ground is extremely rocky, you may have to rent professional equipment to dig your postholes.
String line: When you install your fence, you want it to be straight. To make sure your posts are lining up, you can’t just depend on your eyes alone. Instead, you will need to use a string line. You may have heard that lasers can also be used for this purpose, but they tend to be a bit pricey and are not required for the task. Strings, on the other hand, are cheap and get the job done just as effectively.
Permanent marker: If you have to cut some fence panels shorter than the standard lengths they come in, use a permanent marker to mark them.
Band saw: Once you’ve marked each section, use a handheld band saw to cut sections that may be too wide. If you don’t have a hand saw, you can buy one or, depending on where you live, you might be able to rent one from a hardware dealer in your area.
Level: Once you’ve inserted your posts into the holes you’ve dug, you’ll have to ensure these posts are upright and level. Make sure to use it on every post.
Drill gun: While you’re free to install all the screws and fence hardware with your own hands, you could do it all twice as fast with a drill gun. Unless you’re a hardcore DIYer who loves working with your hands, you’ll probably want a drill gun to save time and effort. Make sure to get a cordless one, as you will most likely not be anywhere near an electrical outlet.
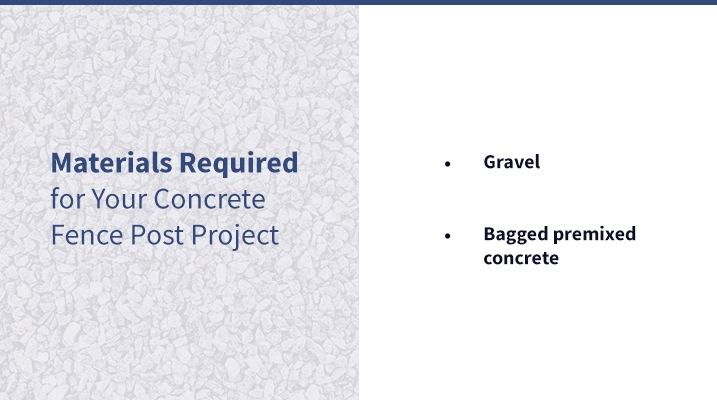
In addition to your posts, fence panels and other associated fence hardware, you will also need gravel and concrete to set the posts in place securely:
Gravel: Gravel has a variety of applications in landscaping, and installing fence posts is one of them. After digging a hole for a post, you’ll pour gravel into the bottom, which the post will sit on top of. This gravel enables water to drain away from the post’s base.
Bagged premixed concrete: Once the post has been placed on top of the gravel, bagged premixed concrete will then be poured around it. This concrete mix blends sand, gravel and cement and can set in as little as 20 minutes. Just put the mix into the posthole dry and then soak it with water.
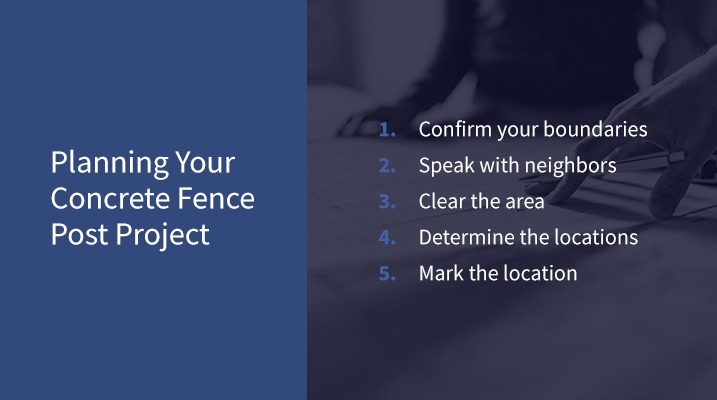
Planning Your Concrete Fence Post Project
A concrete fence post project doesn’t begin by just digging — there is also some planning involved. Here are the steps we recommend to get all your ducks in a row:
Confirm where your boundaries are: If you’re planning to build a fence on the border with a neighbor or public land, take a look at an official boundary map and ensure you’re not going to build your fence on someone else’s property. Building your fence on your neighbor’s land is not advised, and if you build one on public property, you may end up being fined. Look closely at the maps and make certain you know exactly where your property is on paper. Your local building department can provide you with a complete map of your property, and your neighbors may be able to help with this, too.
Speak with neighbors and authorities: Speaking with your neighbors while you’re still planning your fence is highly recommended. If you’re building a fence that’s too high and blocks out light, for example, your neighbors may object, in which case you may want to modify your plans. It’s also important to speak with local building authorities about your fence plans, and all districts have laws regarding fence style, color and height. If you build a fence in violation of any local laws, you may end up having to take it down. Seek the advice of a local building regulations official.
Clear the area where your fence will go: Once you’ve decided on where your fence will go and all authorities and neighbors have approved it, you can begin clearing the area where you’ll be building your fence. Take out rocks, shrubs and anything else that will be the way of your fence.
Determine the locations of your posts: Use a measuring wheel to measure the distance between each post. As we mentioned above, we recommend the measuring wheel because of its accuracy and readability, but if you’re looking for a cheaper alternative, you can also use a tape measure.
Mark the location of each post: Once you’ve determined where each post will go, mark the spot using garden stakes or spray paint.
To dig the postholes, we recommend you use a posthole digger or auger. When digging, make sure the holes are:
Wide enough: Make the postholes three times wider than the width of your post.
Deep enough: The postholes should be deep enough that at least a third of the post is below grade. The hole you dig should also accommodate a 6-inch-deep gravel layer on which your post will rest. In other words, the depth of the hole should be 1/3 the original length of your post plus 6 inches. However, the building codes in your municipality may require a certain minimum depth, such as 30 inches, which is why it’s important to speak with the building authority in your area before you begin digging.
Based on the size of your postholes, you can calculate how many bags of the bagged premixed concrete you’ll need for each hole. With a 50-pound bag, you can make about 0.375 cubic feet of concrete. So, if your posthole is, say, 12 inches wide and 30 inches deep, it will require five bags of the mix. If you’d rather not do any math, many brands offer concrete mix calculators on their sites, which will tell you the exact number of bags required to fill your posthole.
How to Install Concrete Fence Posts
Once you dig all your postholes, you’re ready to install your posts. To do so, follow these steps:
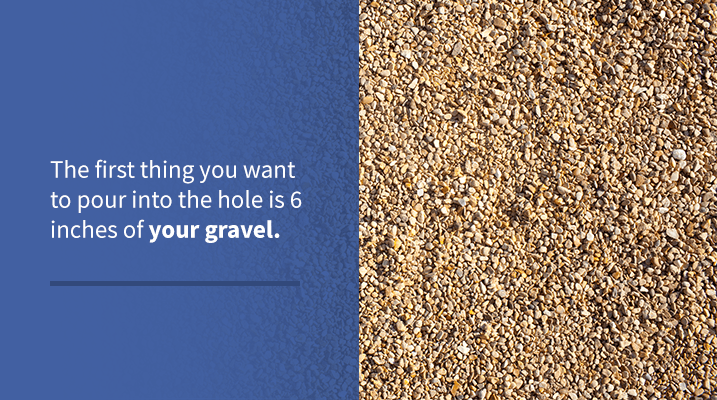
Add gravel: The first thing you want to pour into the hole is 6 inches of your gravel. Gravel serves as a stable foundation for the post to rest on and provides drainage away from the bottom of the post.
Place the fence post in the hole: Using the fence post, tamp your gravel down by setting your post in the hole and lifting the post up several inches and bringing it back down hard on your gravel. Do this three to five times, and the gravel should even out. Make sure to wear gloves while doing this.
Make sure the post is upright: Move the post to the hole’s center and keep it upright. For this step and the next, it’s easiest if you have an assistant to keep the post in place as you add the concrete around it.
Pour the dry concrete: The next step will be pouring the dry concrete, which is dusty work, so you’ll need to wear work gloves, a dust mask and protective eyewear. You don’t want this stuff in your lungs or eyes. Next, pour your premixed concrete in your posthole, trying to keep the level even all around the post. While doing this, make sure your assistant keeps your post centered and upright. One thing they absolutely must not do is lift the post, which will allow the concrete mix to get between the post and the gravel below. If this happens, getting the post to touch the gravel again could be a lot of work.
Stop 3 inches below the level of the ground: Continue to fill your posthole with the concrete mix until it’s roughly 3 inches below the top of the hole.
Pour water over the dry concrete mix: Next, you’ll add water to your dry mix. Add a gallon of water for every 50-pound bag that you use. For a posthole 30 inches deep, you will need around five gallons. You should add the water slowly, so it will have time to seep down, saturating the mix in the process. If the posthole is more than 30 inches deep, we recommend that you pour the dry mix and water in two parts. For instance, if you’re installing a taller post in a hole that’s 4 feet deep, start by adding half of the dry mix you’ll need, then pour in half of the necessary water. Then, add the remaining dry mix and then the remaining water. Doing this ensures the dry mix at the very bottom will receive enough water.
Level the post: Right after you’ve finished pouring the mix and water into your posthole, begin leveling the post. Grab your level and place it along two adjacent sides of the post to ensure it’s plumb.
Press the wet concrete: Once your fence post is completely plumb and level, firmly press the wet concrete around the base of the post using a narrow sharpshooter shovel. If you don’t have one on hand, a pole or stick will also do the trick. Work as quickly as you can during this process, as premixed concrete can set in 20 to 40 minutes, after which it will be hard, and you’ll no longer be able to adjust it.
Allow the concrete post to cure in the concrete: Before continuing constructing the fence, you will need to wait four to six hours for the concrete to cure completely.
Cover with soil: If you’d like your posts to have a more finished look, you can cover the top of the cured concrete with soil.
Tips to Keep in Mind When Installing Concrete Fence Posts
In this section, we’ve compiled a couple of useful tips to help you avoid common pitfalls when you install your concrete fence posts.
Making a String Guide
We mentioned above that installing multiple posts in a straight line can be challenging without the right techniques. If you want your posts to be perfectly aligned with one another, a string guide is an easy way to do this. To do this, you will only need some strong twine or string. Once you’ve acquired these items, follow the steps below:
Set only the two end posts: Dig all the postholes that will form a straight line, but only set the fence posts on the ends by following the steps above. Wait four to six hours for the concrete to cure.
Run a top string: Tie one end of one string around one end post about 6 inches from the top. Run the string to the other end post and tie it 6 inches from the top there as well.
Run a bottom string: Tie another string about 6 inches from the bottom of each post. Together, these two strings create a guide for the rest of the posts.
Set the remaining posts: To set the rest of the posts, position each one in its corresponding hole, making sure the post is 1/8 inch from the bottom and top strings. Fill each hole with concrete once each post has been correctly positioned.
If each post touches the strings, the result will be a fence that looks very straight and professional.
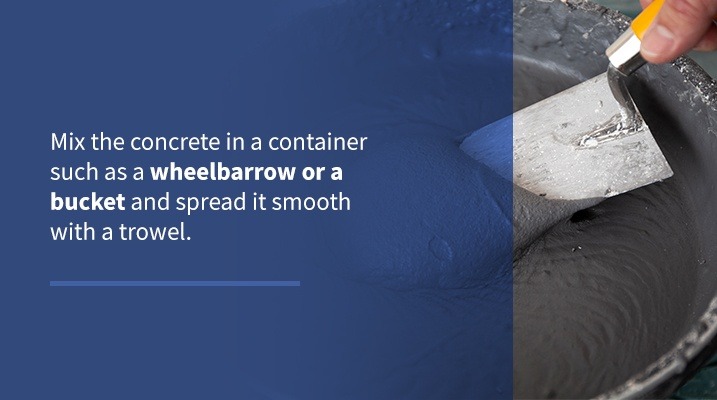
Divert Rainwater With More Concrete
If you live in a region with lots of rainfall, rather than topping off each hole with soil, you instead could top it off with more concrete, which will divert water away from your post. However, when making this concrete, you’ll want to mix it in a container such as a wheelbarrow or a bucket and spread it smooth with a trowel.
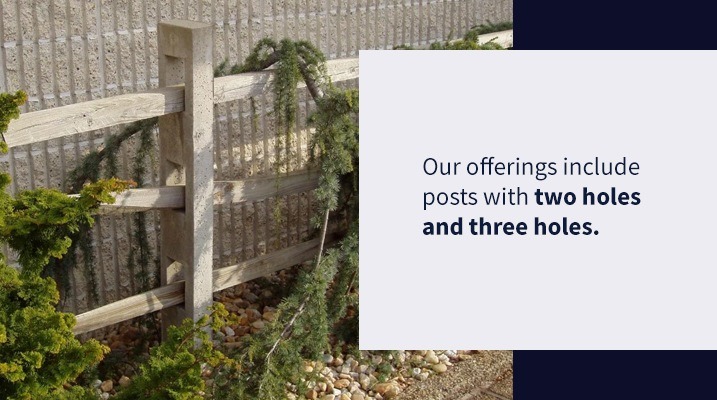
Find Concrete Fence Posts at Nitterhouse Masonry
If you make Nitterhouse Masonry your supplier, you’ll have a couple of options to choose from when it comes to concrete fence posts. Our offerings include posts with two holes and three holes, depending on your project and fence type. Our posts are 59 inches long and measure 7.5 by 7.5 inches. They weigh 104 pounds each and have a recommended installation depth of at least 2 feet.
Our posts are made in our Chambersburg production center. They’re great for a wide range of applications, including fencing yards, lining pastures and serving as horse fence posts.
With us, quality is a guarantee. Our concrete posts are extremely durable and long-lasting, having been designed to withstand all kinds of harsh weather conditions. Our posts are especially useful in rainy regions where wood posts tend to rot quickly. The concrete we use during production is of the highest quality, meaning you will get the durability and longevity that you’d expect from investing in concrete fence posts.
In addition to our premium products, we always stand out among competitors for our unparalleled customer service. If you want to know more about our products or would like some professional guidance while considering your options, we are always happy to help.
Nitterhouse Masonry uses a network of dealers across the Eastern U.S., which includes: