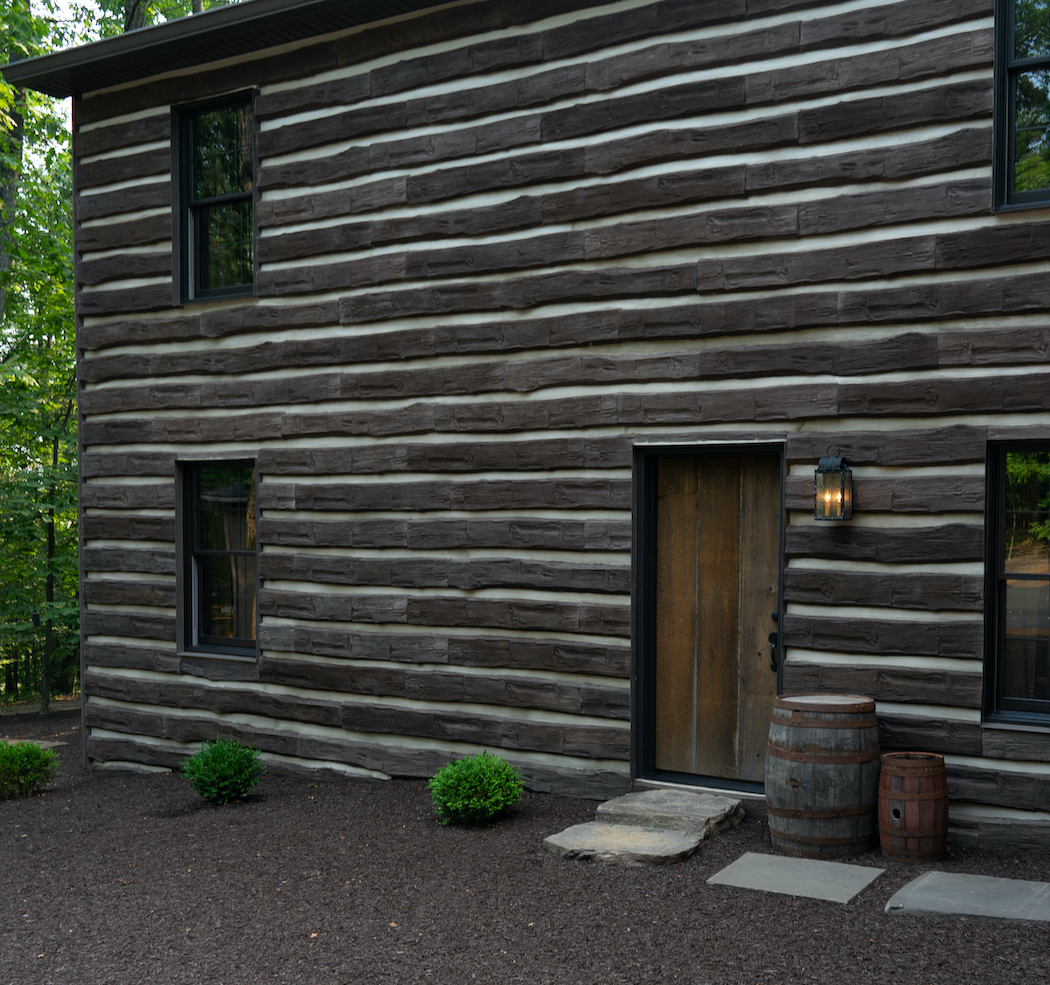
Veneer Stone Installation — DIY

Masthead Background Image

What Is Veneer Stone?

Whether you’re looking to add a French-country flair to your home’s exterior or updating your contemporary-style backsplash with sleek, urban stone panels, veneer stone is your go-to DIY solution.

Veneer stone is a versatile and enduring option to decorate the surfaces of walls. From natural stone veneer cut and shaped into lightweight slabs to the mosaic and cost-effective selection of manufactured stones, they make an excellent inclusion to refresh and highlight the feel of a space.

What’s more, veneer stone installation can be applied to nearly any base surface in any corner or segment of the house, with a stunning variety of stone types to choose from.

Tools Required for Your Veneer Stone Project

Regardless of the size and scope of your project, there are a few key tools you’ll need on hand. Installing veneer stone has never been simpler or more straightforward. With these tools and materials tucked into your “belt,” you’ll be sure to stay on track and on budget:

Tools

  • Trowels. These are for spreading your scratch coat and bond coat mortar.
  • Mason hammer or cut-off angle grinder. This tool is ideal case you’d like to chisel or finely shape any stone edges to your exact liking.
  • Rake. You’ll need a rake just like the kind you use for pesky leaves in your yard. Rakes are a simple solution to hack your scratch coat step.
  • Staple gun. This is for applying nails or staples through your metal lath.
  • Grout bag. The grout bag is handy to fill in between stone joints after placement.
  • Joint tool. For smoothing and finishing your joint grout, you’ll want a joint tool.
  • Brushes. You’ll want a set to dampen your veneer stones and a separate set to dust and clean the stones off at the conclusion of your project.

Materials

  • Moisture barrier. If you’re placing your veneer stone over drywall or exterior wood panels, building codes require you to begin your installation by applying a moisture barrier. There are plenty of waterproof house wraps on the market you can purchase today.
  • Galvanized metal lath. You will need a minimum of 2.5-lbs. worth.
  • Galvanized nails or staples, or masonry nails. These are necessary if you’re applying to a mason foundation.

You will also need:

  • Veneer stone mortar mix 
  • Selected veneer stones 

Planning Your Veneer Stone Project

Any good do-it-yourself project is remiss without proper planning. Luckily, you have only a few boxes to check to properly install your stacked stone veneer. As one of the most straightforward aesthetic applications you can implement, it only takes a little foresight and a few intuitive questions to holistically plan your stone project:

  • Application location. Veneer stone creates an attractive focal or accent point almost anywhere in your house. Its range of layouts, detailing and overall hardiness also makes it suitable for indoor and outdoor application, from front-porch columns to redoing the face of a living-room fireplace. Wherever your eye craves a decorative and time-tested pop, veneer stone will shine.There is one thing to note, though. You might encounter a few extra steps depending on the base material you’ll be applying your quality stone veneer to. For example, installing veneer stone over exterior drywall or exterior wood walls must begin by placing a moisture barrier before your metal lath sheet. When installing veneer stone over exterior cement walls, concrete and masonry — internal or external — you’ll only need the metal lath.
  • Aesthetics. How do you want the finished product to look? Do you want thick stones, thin stones or a mix? Large or small cuts and trims, dark and lighter shades? Rounded, European-style stones or horizontal, contemporary stacks? All must be mixed and matched ahead of time to create the visually engaging veneer-stone surface of your dreams.
  • Material type. You won’t be bored when it comes to selecting your stone material type. From full natural stone veneer cuts you mortar and place one by one to stone horizontal panels you lay in stacked sheets, you can be confident you’ll find a veneer material that matches your aesthetic and your comfort level.
  • Material measurements. Just how much veneer stone do you need? Simply multiply the width of the surface you’ll be veneering with its height. Then, subtract the square-foot surface area of any windows, doors or corner pieces contained within that desired surface. To be safe, add an additional five to 10 percent square feet to your order. This allows measurement wiggle room, as well as for you to have some fun if you choose to personally cut and trim certain stones.
  • Calculations. Along with calculating your material measurements, be sure you know the cost of your stone veneer order plus tools and project materials. Allot a timeframe for your installation. Interior projects, such as installing veneer over a fireplace, can be achieved within 24 hours, while larger DIY-exterior installations may take a weekend.

Common Installation Areas

Where to feature stone veneer is as much about subjective style as it is functionality. The most popular installation areas match stone’s natural strength and durability with eye-catching, bold features that balance this unique form and function:

  • Fireplaces. The facing materials of a fireplace are a perfect place for natural veneer stone, whether you have a traditional wood-burning fireplace, a gas fireplace or a modern electric unit.
  • Interior walls. Interior drywall, plywood, sheetrock, green sheetrock or fiber cement boards can handle veneer stone as it spans wall-to-wall to elevate the atmosphere of a room.
  • Exterior walls. From framed plywood panels to wall sheeting, flush siding, concrete, masonry and stucco, nearly every type of common exterior wall can incorporate stone veneer as its surface feature.
  • Accent walls/panels. Use veneer stone as a complementary pop across strategic features of room, such as kitchen and bathroom backsplashes, cozy nook panels or bedroom accent walls.
  • Columns. Veneer stone adds an expensive-looking detail and depth to porch and entryway columns, both inside and outside a building.

If any of your stones are being applied to clean, unpainted and untreated exterior concrete or masonry, installation will be a little simpler. These material bases do not require waterproof barriers, which are early steps in the DIY installation process, described in-full below.

Installing Your Veneer Stone: DIY Steps to Follow

With tools in-hand and a vision in mind, you’re ready to take on the DIY-task of installing veneer stone. Follow these steps exactly, and you’re sure to have a one-of-a-kind veneer surface you can be extra proud of:

1. Surface Layering

First, prepare your project and lay out all your tools and equipment. Ensure the base area where you’ll be installing your stone veneer is clean and dry.

  • Apply a moisture barrier, if needed. Depending on your base material, you’ll need to first apply a moisture barrier to be building-code compliant. Waterproof building paper should be nailed or stapled in a siding, or horizontal, fashion, with each sheet overlapping in all directions by a minimum of six inches. If you’re unsure whether you need a moisture barrier, don’t hesitate to consult your veneer retailer or specialists. Smaller, handmade veneer regional companies made up of craftspeople themselves will often go the extra mile to ensure you have all your material questions serviced from the get-go, especially if you’re a DIY customer.
  • Attach your metal lath barrier. Use a minimum of an 18-gauge, galvanized metal lath sheet. Attach the sheet to the wall using galvanized nails or staples, spacing them no more than six inches apart. Make sure the nails penetrate the metal studs at least an inch thick
  • Mix and apply your scratch coat mortar. The scratch coat is the overall, major layer of mortar your veneer stone will be stacked into. Properly mixed mortar will be a firm consistency and will stick on your trowel even if you flip it ninety degrees on its side. Use your trowel to spread the mortar across your metal lath layer, approximately .5-inches thick, until the entire surface is evenly covered
  • Scrape horizontal grooves into the scratch coat before it’s fully dry. You can use a common rake to apply these long, horizontal lines across your scratch coat. This scoring is an important step for proper mortar moisture, aeration and installation composition
  • Let this scored scratch coat set until firm. This usually takes 24-36 hours, depending on amount and conditions.

2. Install the Stone

Arrange your stones by laying your stones out on the nearby floor or ground, mosaic-style. This gives you a big-picture review of your veneer stone arrangement before you stick them into your scratch coat.

  • Trim and shape your stones. Using your mason hammer or angle grinder, trim any imperfections on the stones. Shape and smooth the edges to your exact finished look, if desired. This kind of fine-tuning is usually only a process required with purchases from big-box retailed stones. Most handmade regional producers enact finely tuned custom stones into your initial order.

  • Clean your stones. Wipe away excess dust, residue or oils from your stones. Use your dry set of brushes to lightly clean the entire stone’s surface area to avoid scratching or denting.
  • Mix your veneer mortar. Ensure the same even, firm consistency as your scratch coat. This mortar will be used on the backside of your individual stones as its bond coat.
  • Dampen the backs of your stones. Use your designated wet brushes or a sponge to lightly dampen the back side of the veneer stones. This prevents water from being drawn out of your bond coat, which is essential to maintaining a strong and solid mortar foundation between your wall and your individual stones.
  • Back butter the stones to build a bond coat. Take your trowel and place a good dollop of mortar on the back of your veneer stone, i.e. the side you intend to press into the wall. Spread the dollop evenly, roughly .5-inch thick. This is an important and sometimes overlooked step, even for seasoned installers. Back buttering ensures you have the strongest adhesion possible between veneer material and base, be that base drywall, concrete, wood paneling and more.
  • Begin hanging your veneer stones. Start at your wall base and corners. Press the veneer stones firmly into the scratch coat until mortar begins to squeeze out around the stone’s edges. Feel free to tilt and jimmy your stones a little bit into place, as this helps move out excess air and seal in necessary binding moisture.
  • Place the rest of the stones, working from the bottom up. Ensure the joints, or space between individual stones, are no more than half an inch thick as you continue to stick and place. Keep these joint widths consistent throughout your wall, taking momentary pauses to step back and assess your layout.

3. Apply finishing touches

Fill in the joints with a grout bag to slowly and carefully fill in the joints between stones with extra grout. When the grout has dried most of the way — but not completely — use a joint tool to chip out excess grout bulbs or chunks.

  • Smooth and clean the overall surface. Brush away excess dirt or mortar that’s leaked onto the visible face of your veneer stones. You want to do this while your mortar is still semi-wet, as congealed mortar will need a lot — and we mean a lot — of muscle to chip away. Use brushes and joint tools that are completely dry.
  • Consider a sealer. Adding an extra layer of protection for your stones will increase their longevity and resistance to wear from water, salt, dirt and other stains. However, some sealers may affect the color of your stones, as well as add a gloss or sheen.

Quality and craftsmanship are the name of the game when it comes to installing veneer stone. The need for long-lasting durable surfaces is too important to skimp on.

There are a number of choices when it comes to shopping for veneer stones, as well their necessary tools and materials. For DIY installation projects, you want to keep the caliber of stones, service quality and overall character top of mind when looking to get your veneer stone:

  • Craftsmen veneer dealers. Direct veneer-stone dealers are arguably your best option to ensure stone quality, reliability and versatility. These craftsmen-style dealers live and breathe their brand and product reputation. They know that competing with major retailers takes more than just producing a good natural or manufactured stone. You’ll likely find customer service, quality inspections and a sense of camaraderie with these small to mid-sized dealers — ones with often unmatched, first-hand knowledge and involvement across stone-veneer production and design.

  • Handmade regional products. Look for dealers and companies with regional ties and distributions. For stone veneer, in particular, this assures quality and keeps form and function at the heart of every product catalog.
  • Think twice about big-box retailers. Cost can’t be everything. While mega-retailers can seem like one-stop shops for DIY projects, they often don’t provide the personalization or professional attention you might need to nail your solo endeavor.

Trust Nitterhouse Masonry for High-Quality Stone Veneer

We service top-quality block and building materials we’d trust to construct our own homes. We’re a five-generation family-owned business that brings heart and history to all our work.

Wall made of veneer stone.
Contact us

CHAT WITH ONE OF OUR EXPERTS, FIND A REGIONAL DEALER OR PERUSE THE CATALOG OF QUALITY MANUFACTURED AND NATURAL STONE VENEERS WE MAKE.